Our Town
Developed by Jessica Iiams, PCM Play Intensive 2021
(FOCUS: K-2, 3-5, Visual Arts, Civics & Culture, History & Humanities, Language & Literacy, SEL)
This lesson is a great way to begin a unit on communities. The class discusses what a community is and how we are all important to different communities. Students consider what is important to include in our neighborhoods such as our school, grocery stores, and medical facilities, then they work together to create “Our Town” taking into consideration every member’s needs. It pulls the class together right at the beginning of the year.
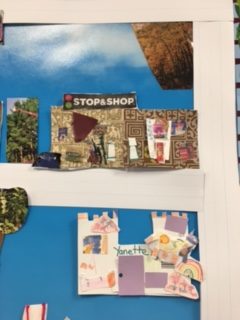
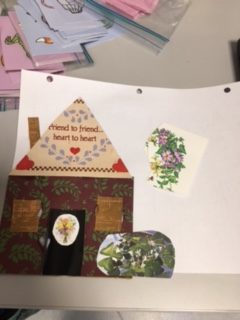
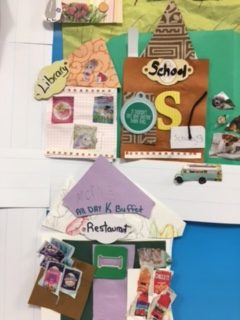
This lesson is a visual arts project. Using recycled paper products, each student creates a house for themselves and one community building. The whole class decides on how the town should be presented. Should the streets be placed parallel and perpendicular to one another, or should it be arranged in a creative circular pattern? Should the community buildings all be next to each other like a shopping center or dispersed throughout the town next to different people’s homes? Once the town is all put together, the students can continue to add to it throughout the unit or even the year. Maybe they want to add vehicles, animals, trees, or even things to represent seasonal changes. The possibilities are endless. It is important for young children to recognize that all people belong to a larger community and that we all work together to survive.
While constructing the town, many opportunities for additional learning occurs
- Majority Rules – Voting
- Importance of Natural Resources
- Importance of Entertainment
- Religious and Ethnic Diversity
- Maps and direction
- Addresses
- Etc.
Materials
- Recycled paper products such as old greeting cards or scrap booking paper; cardboard scrapbook letters and call outs; stickers; magazines; newspapers and circulars; etc.
- Scissors
- Glue or Tape
- Bulletin-board paper and borders
- Large bulletin-board or wall space
Set Up
Prepare the bulletin-board or wall space ahead of time so that construction can begin straight away and so you have an idea of proportion.
Student’s Job
Use a variety of materials to create the home that you would like to own in “Our Town”. Be as creative and whimsical as you feel! You will also create another building, of your choice, that you feel is needed in a community to make living there safe and enjoyable? Some ideas include a fire station, grocery store, ice-cream shop, school, etc.
Students, can you answer these questions?
- Who and what makes a community?
- What does it mean to be a member of a community?
- Why is collaboration and working together important?
- How do we develop fairness, inclusivity, and friendship in our community?
Further Challenges:
There are several ways to continue using “Our Town” in the classroom:
- Writing projects – Students can write about what their role would be in “Our Town”. Where would they work? Why did they choose to place their own house where they did? Etc.
- Directions – Students can use directional words to explain how to get from one place to another. Place a paper person or vehicle somewhere in “Our Town” and have the student explain how to get from the library to the boat ramp.
- Positional Words – While working on positional words, you can use the “Our Town” map as a prompt for questions. “What is above the ice-cream shop?” “What is below the bridge?”
- Coding – Place an object on the “Our Town” map and give the students a set of ‘coding’ directions to get from here to there.
- Addresses – Students will learn their own address and label their own house from Our Town
Teacher’s Job
Standard’s Alignment
RI EARLY LEARNING AND DEVELOPMENT STANDARDS: SOCIAL STUDIES
Component 1: Self, Family, and Community
Children gain awareness of how they relate to their family and community, understand social roles and responsibilities, and recognize and respect similarities and differences in people.
SOCIAL STUDIES: CIVICS & GOVERNMENT 5 (K-2)-1
Students demonstrate an understanding of the many ways earth’s people are interconnected by… exploring and discussing ways we interact with others around the world (e.g., food, clothing, transportation, tourism, news)
SOCIAL STUDIES: HISTORICAL PERSPECTIVES 5 (K-2)-1
Students demonstrate an understanding that a variety of factors affect cultural diversity within a society by… recognizing cultural differences and similarities between individuals, groups, or communities (e.g., customs, beliefs, language, religious faiths).
SOCIAL STUDIES: HISTORICAL PERSPECTIVES 5 (K-2)-2
Students demonstrate an understanding that culture has affected how people in a society behave in relation to groups and their environment by… describing daily life for individuals in a cultural community.
SOCIAL STUDIES: GEOGRAPHY 1 (K-2)-1
Students understand maps, globes, and other geographic tools and technologies by…organizing information about people, places and environments in a spatial context (e.g., the school is next to a store; a student’s house is across the street from the park).
SOCIAL STUDIES: GEOGRAPHY 2 (K-2)-1
Students understand the physical and human characteristics of places by… identifying and describing natural/physical features (e.g., river, mountains, oceans, weather, climate) and identifying and describing human-made features (e.g., buildings, streets, bridges)
SOCIAL STUDIES: GEOGRAPHY 2 (K-2)-3
Students understand different perspectives that individuals/groups have by… identifying and describing how people in different places view their environments (e.g., home, classroom, neighborhood, community).
SOCIAL STUDIES: GEOGRAPHY 3 (K-2)-3
Students understand how geography influences human settlement, cooperation, or conflict by… describing how people who live near each other sometimes help each other (e.g., sharing set of markers among a desk cluster).
Connections to previous work?
This activity could be connected to our “Construction Unit” later in the year. During a unit on construction, the teacher can refer to “Our Town” when discussing ideas of space and community needs.
Prepare/ Background Info
Prepare pictures of local places that the children may recognize as well as Environmental Print images.
Facilitation Strategies
Show the students the empty space that you have made for the town and explain that with their help it will become a bustling town.
- Show pictures or a slideshow of familiar buildings from your school’s neighborhood. They get super excited to see the places that they pass every day, and it really gets them ready for a discussion.
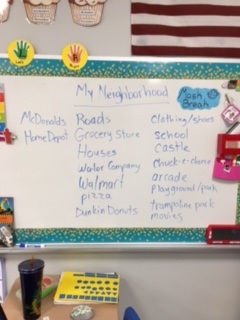
- Have a brainstorming session on what might need to be included in the class town. Record all answers.
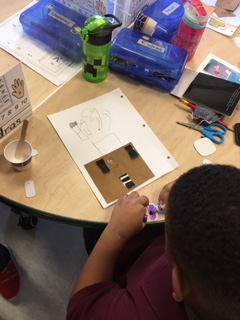
- Next, acting extremely excited, show the students all the colorful materials that you have for the creation of your town. Explain that they will make a house for their family to add to the town. Remind them that this is a creative assignment, and they can make their house look however they want.
- When they have finished their own house, have them pick one of the community buildings from the list that was generated during the brainstorm and create it the same way. Encourage the students to pick different buildings to create but allow duplicates if a student is adamant about what they want to create. (I mean, every community needs 6 Dunkin’s, right?)
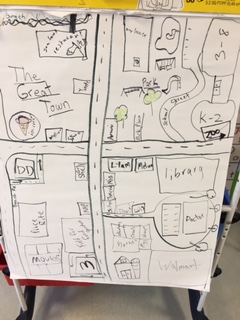
- When the buildings are complete, and drying, go back to the brainstorm list and discuss what else needs to go into a community such as roads, woodlands, playgrounds and parks, bridges if there is water, etc. Also discuss how neighborhoods are laid out. Some towns are set up as a grid; some work around a common “down-town” area; some have smaller streets that stem from one main road; etc.
- Have the children sketch a quick “blueprint” of how they think the classroom town should be set up and then vote on which way to construct the town.
- Finally, start taping your town together on the prepared space. Allow the students to place their creations where they would like them to be and discuss why certain buildings work best in certain places.
*This step could vary depending on the age and size of your students. You, as the teacher, may have to tape the pieces together if the space is too high, however if the students are big enough, they can tape things together themselves. Safety First! - Once everyone’s pieces are added to the town you can name your town and add other variants such as trees and vehicles, people, and animals.
Stand back and let the creativity flow! Facilitate conversations about what a town needs to be safe and enjoyable. Assist with materials if needed.
Play to Notice
Make sure to notice if the students understand the basics of what a building need. For example, does the building have windows and doors? Also, keep an eye out for younger children with limited experience with art supplies such as glue and scissors.
Content Matter to Notice
Are the children gaining knowledge on what it means to work together and be a part of a larger identity? Are they thinking about the larger picture of a town and how all the parts need to intertwine to run smoothly?
SEL to Notice
Keep an eye out for students sharing materials and helping with difficult tasks. Student language around the topic is also important to notice. Are they discussing why certain buildings need to be next to others? Are they discussing, together, where, and how pieces of the town should be placed? Are some of the students natural leaders and others followers? Is everyone’s voice being heard?



0 Comments